RoadDemo is a demonstration (visual aid) app for learning to drive.
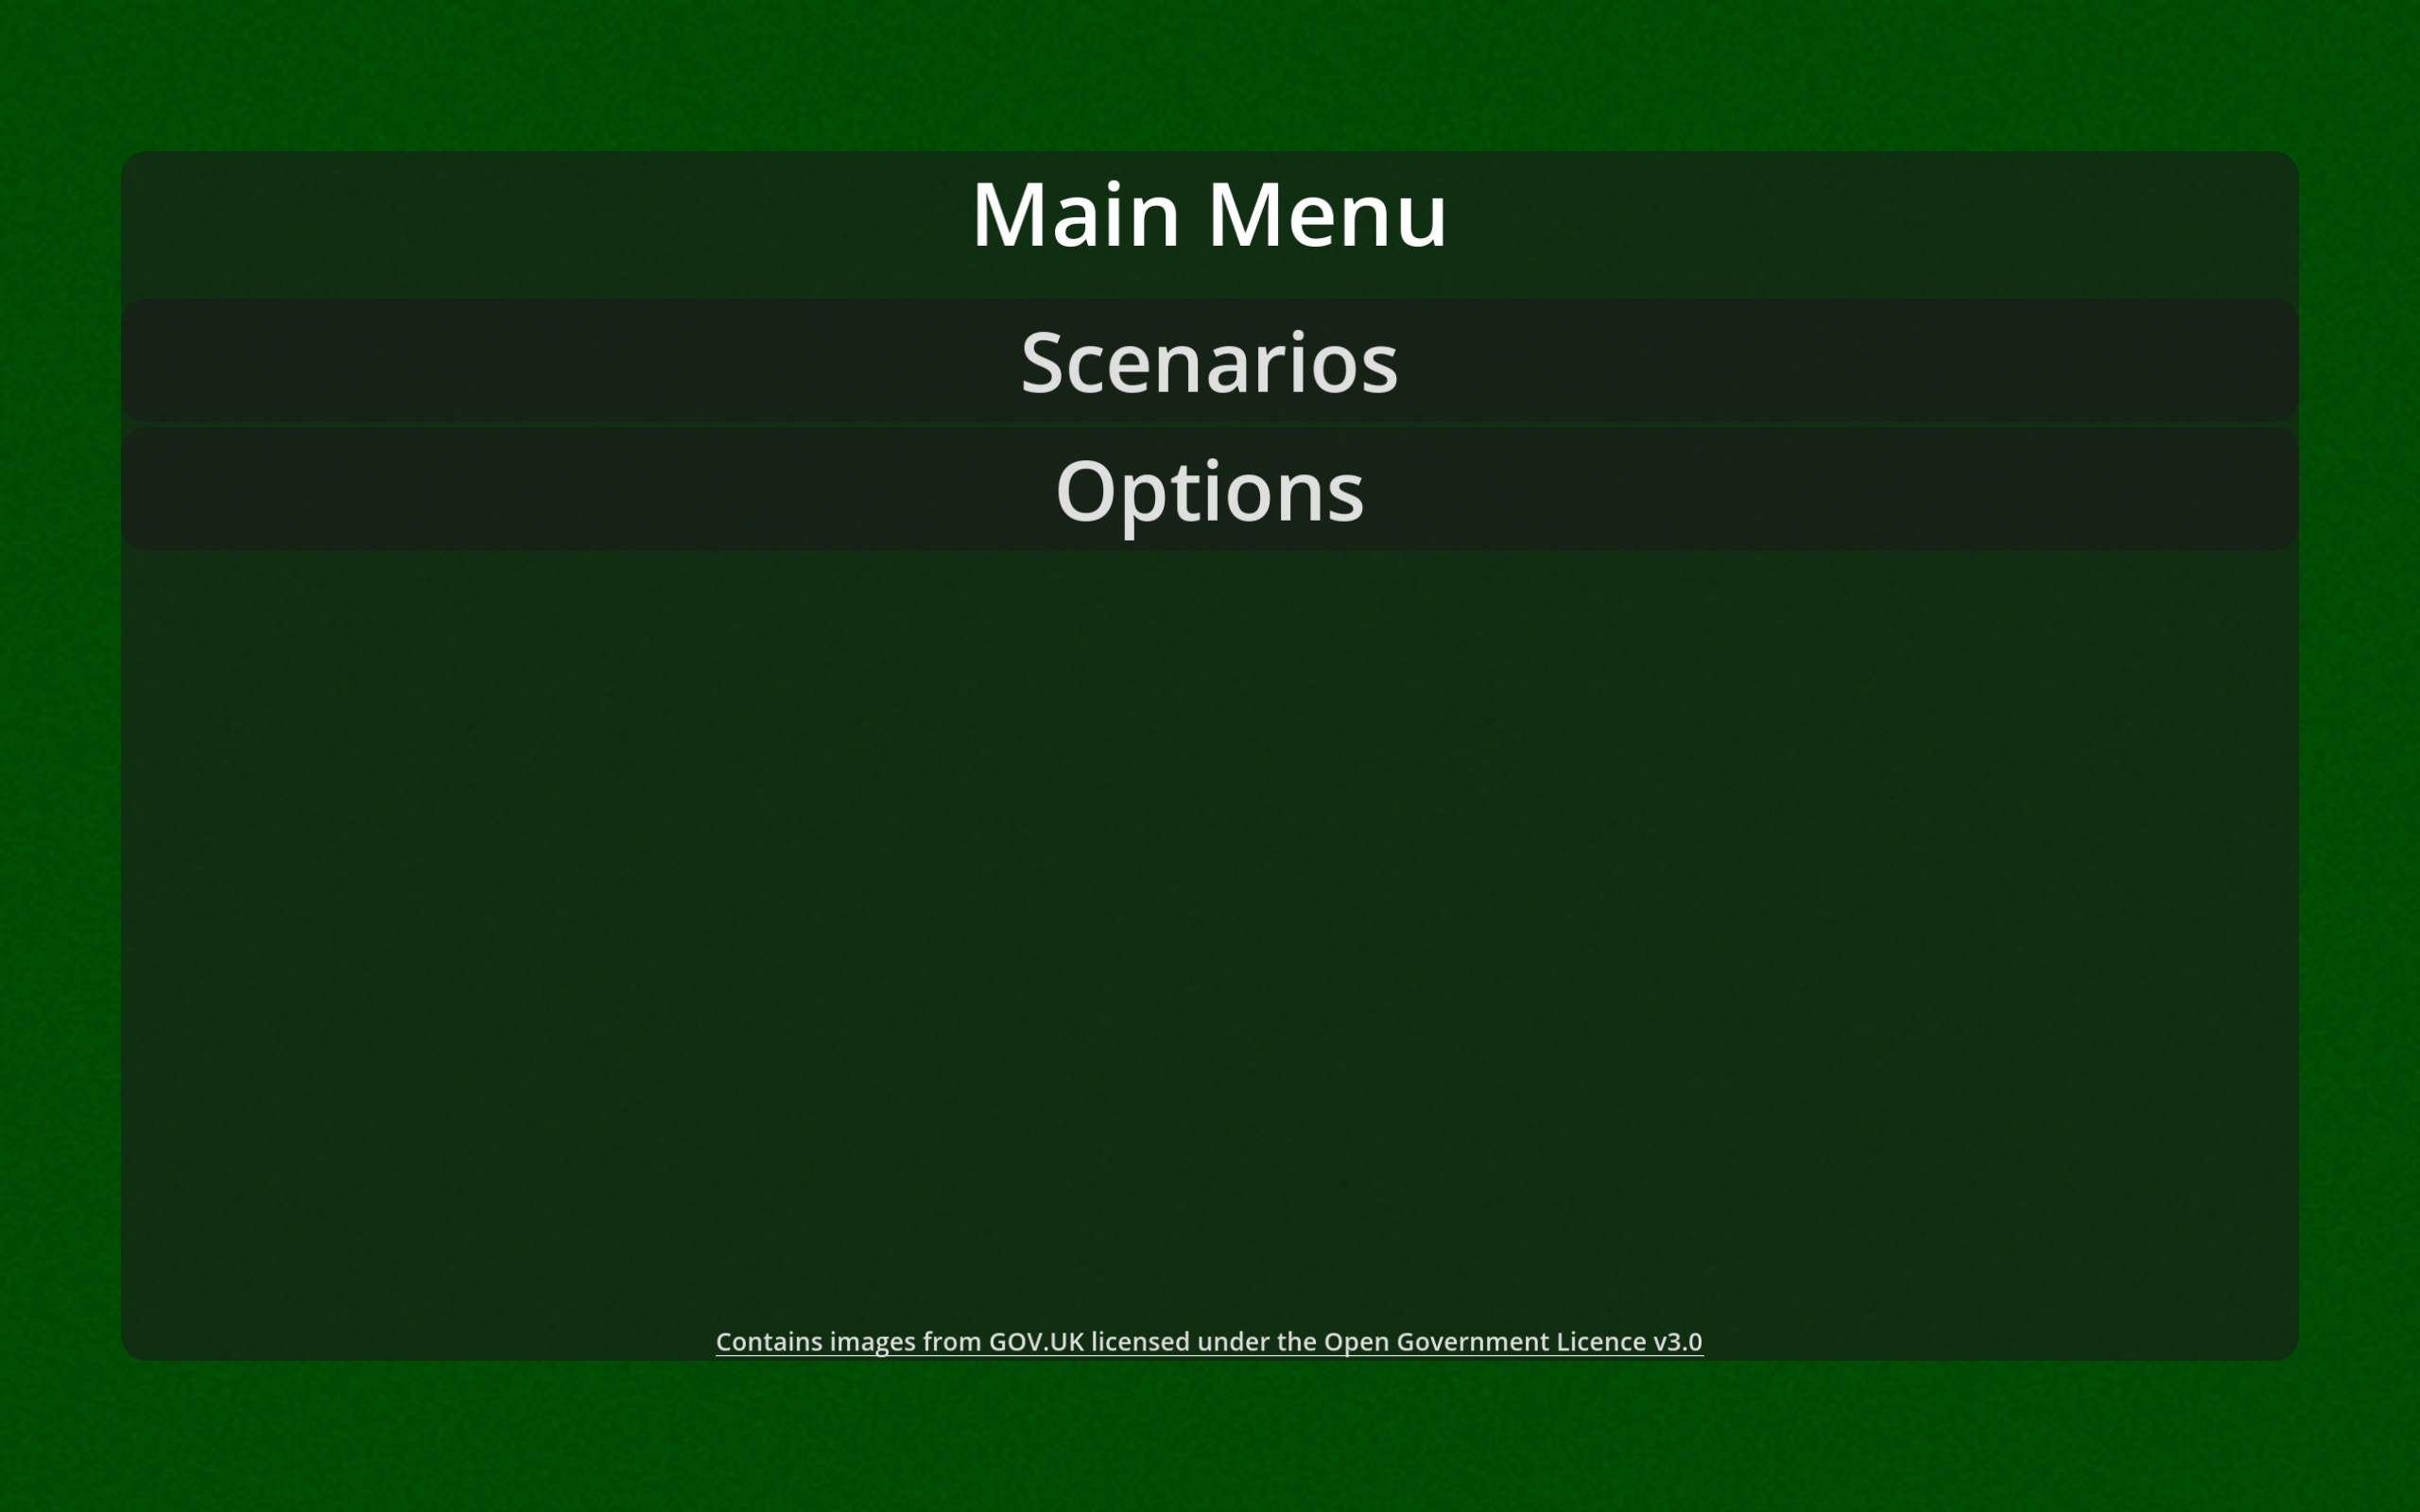
Using RoadDemo
Options
Accessed with the “Options” button from the main menu, this allows you to configure the behaviour of the app. Whatever you set here will remain set the next time you come back to the app.
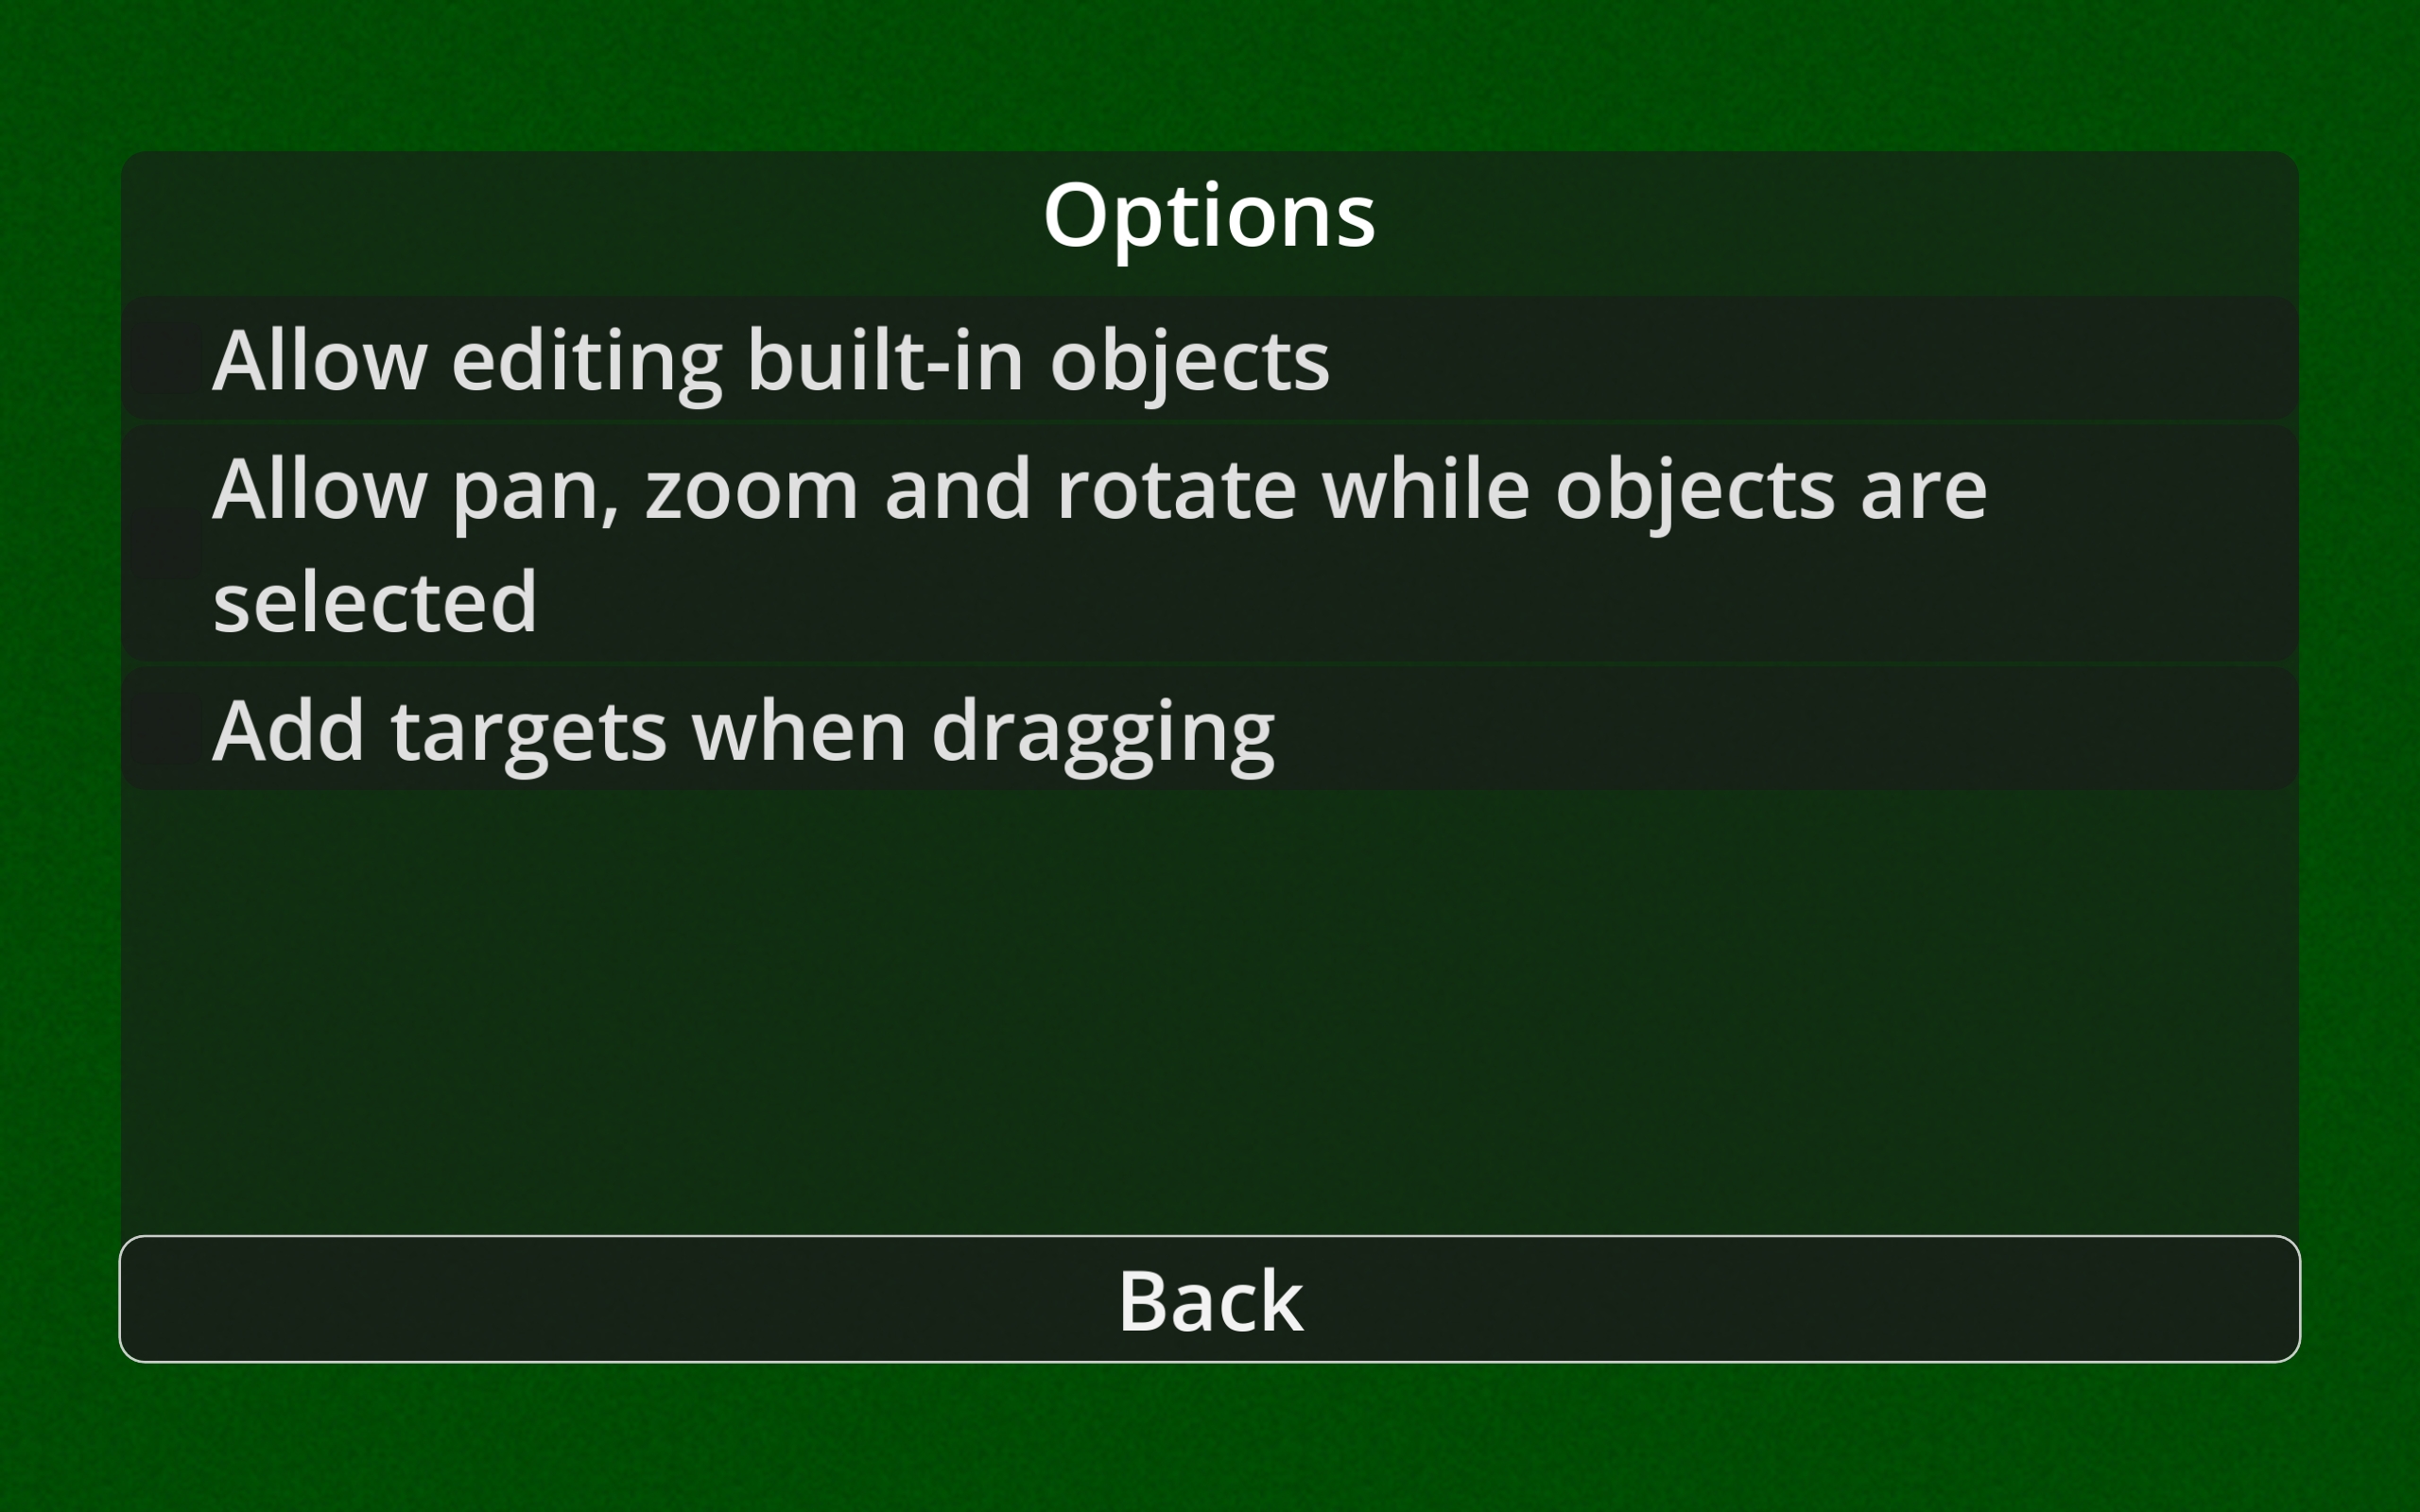
Allow editing built-in objects
In a built-in scenario, most of the objects already present are locked by default so that you don’t accidentally select them. If you want to create your own scenario based on an existing one, enabling this will allow you to move and delete this objects.
Allow pan, zoom and rotate while objects are selected
If this is disabled, you will not be able to move around the scenario while you have an object selected. This is mostly a matter of personal preference.
Add targets when dragging
When controlling a car, you usually add a target destination for it to drive towards by tapping on the screen. If you enable this setting, as you drag your finger targets will be repeatedly added, which could allow you to more quickly get the car moving along the path you wish it to take (but bear in mind, the front of the car steers toward these targets - the car will not strictly follow the path you have drawn).
The “Allow pan, zoom and rotate while objects are selected” option should probably not be enabled if this is enabled - it will try to do both at the same time.
Scenarios
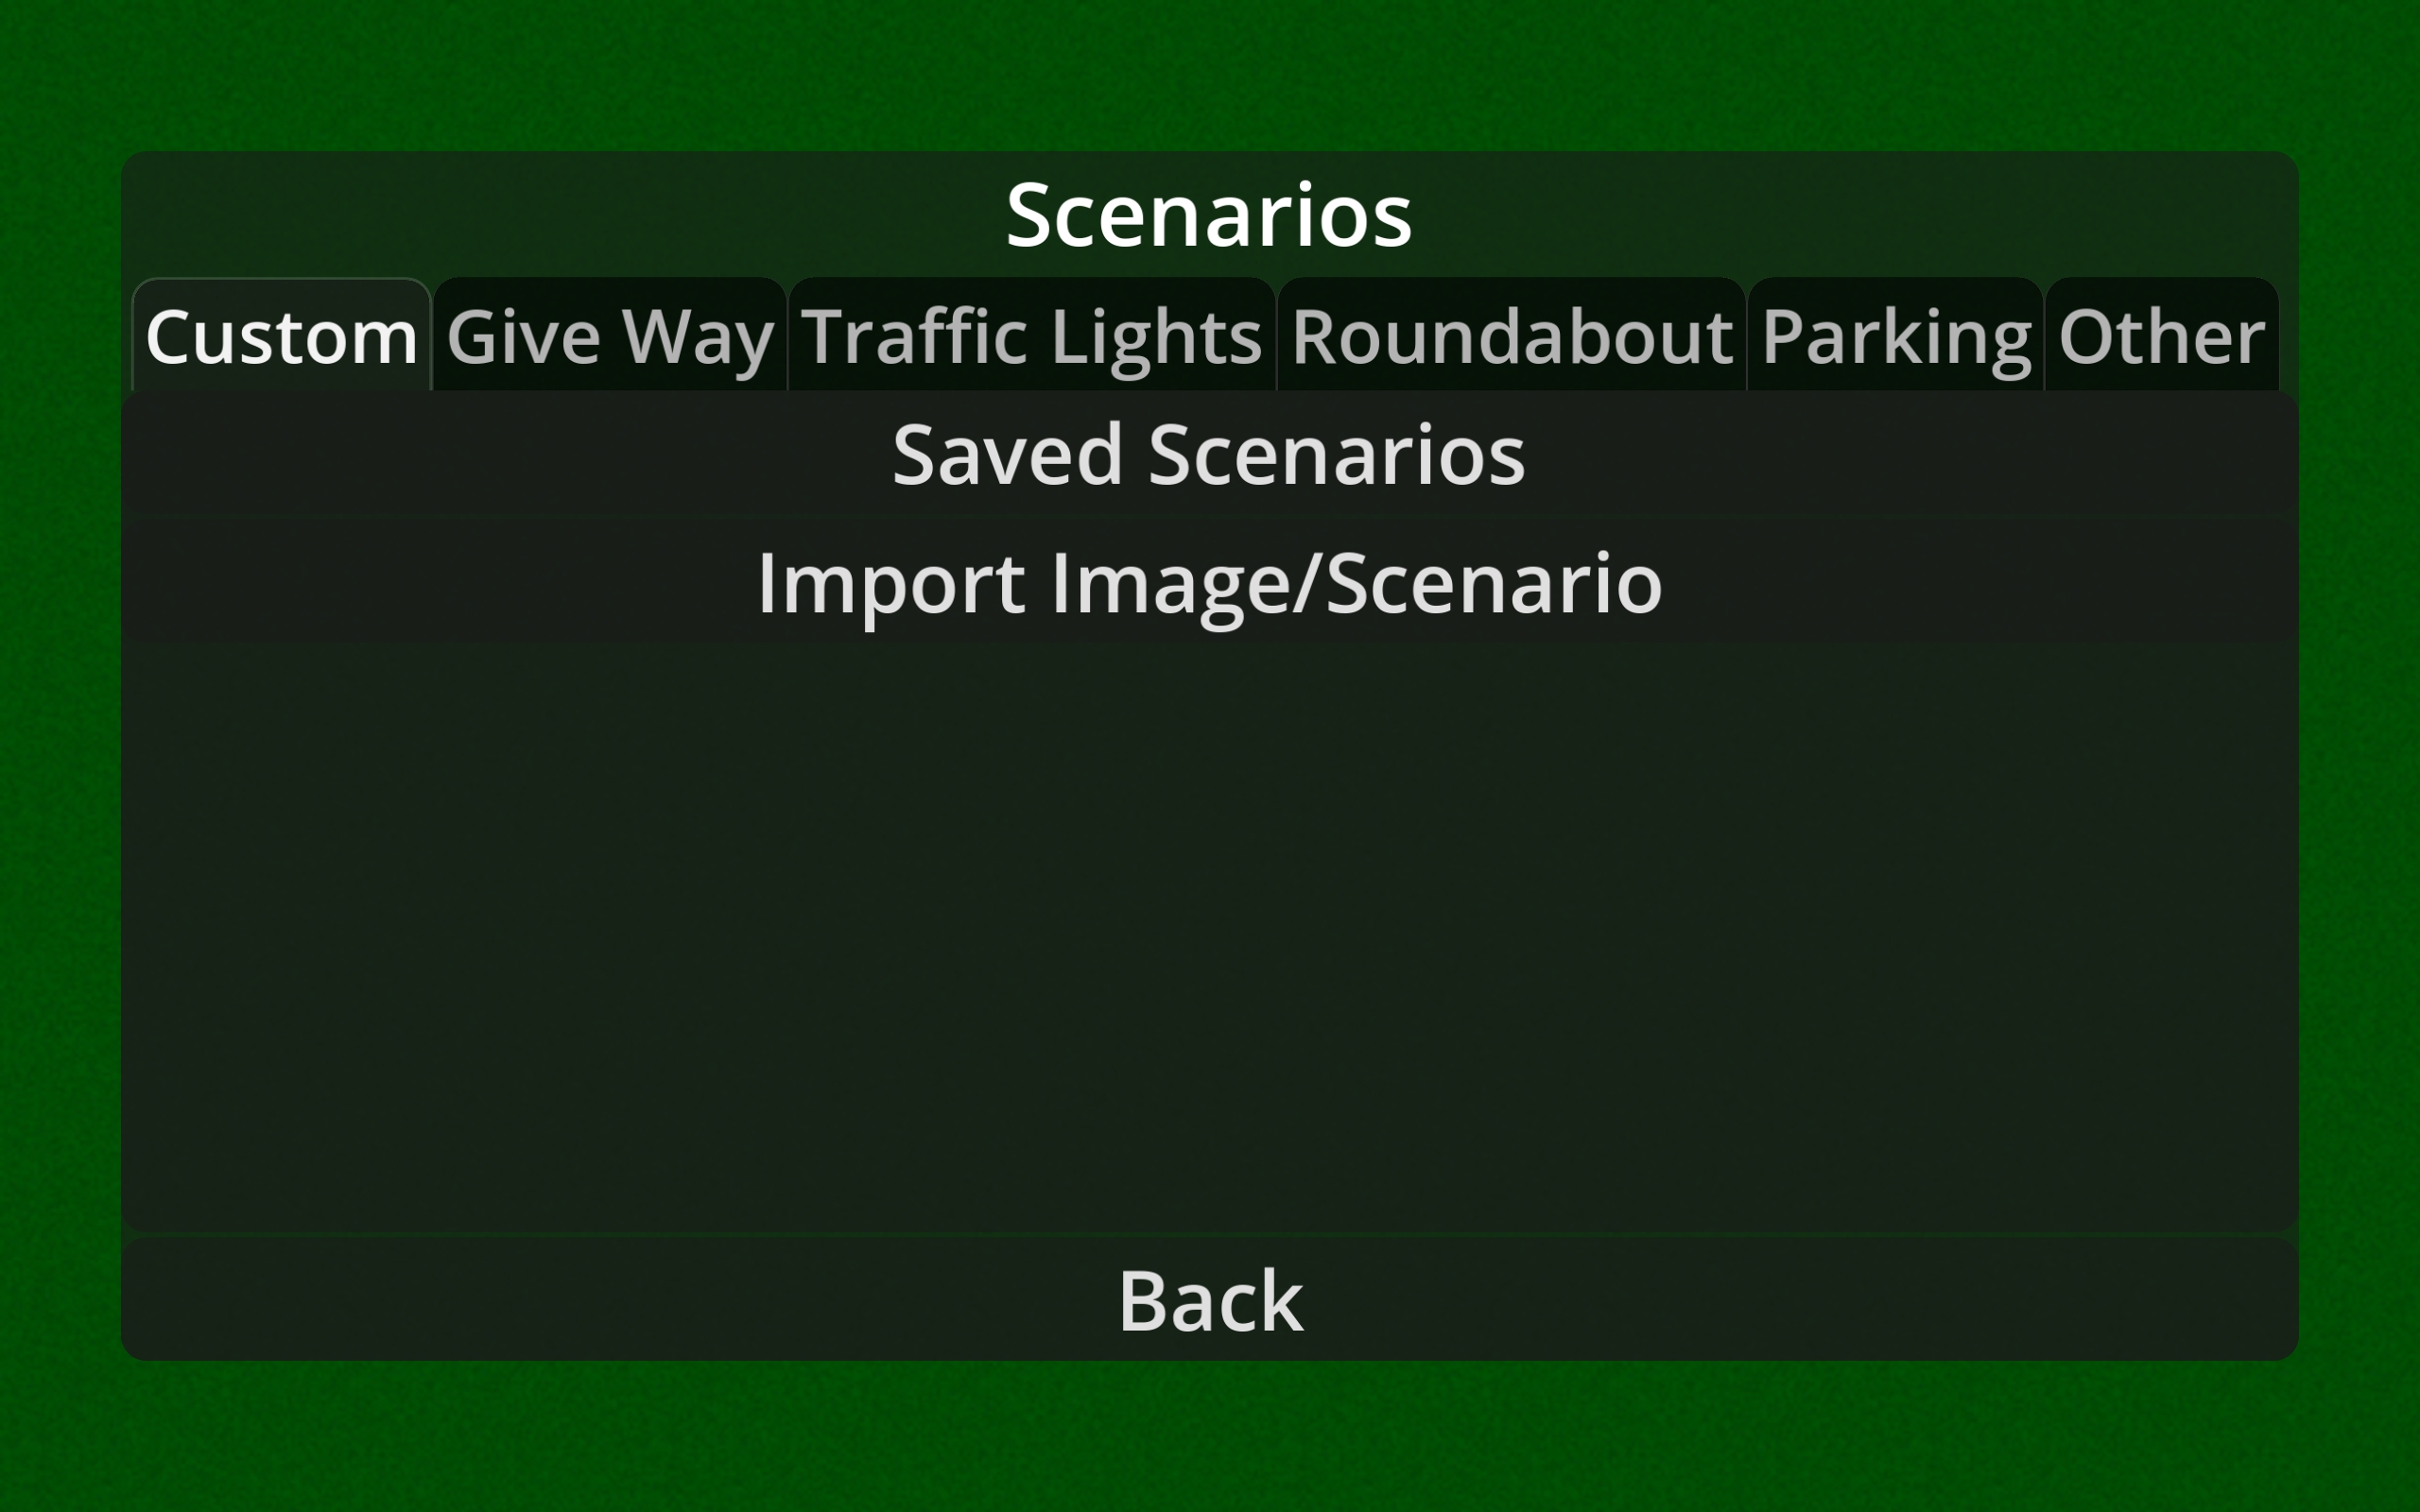
The Scenarios menu has the various built-in Scenarios grouped into tabs, with the first tab being “Custom”. The two buttons here are explained below.
Saved Scenarios
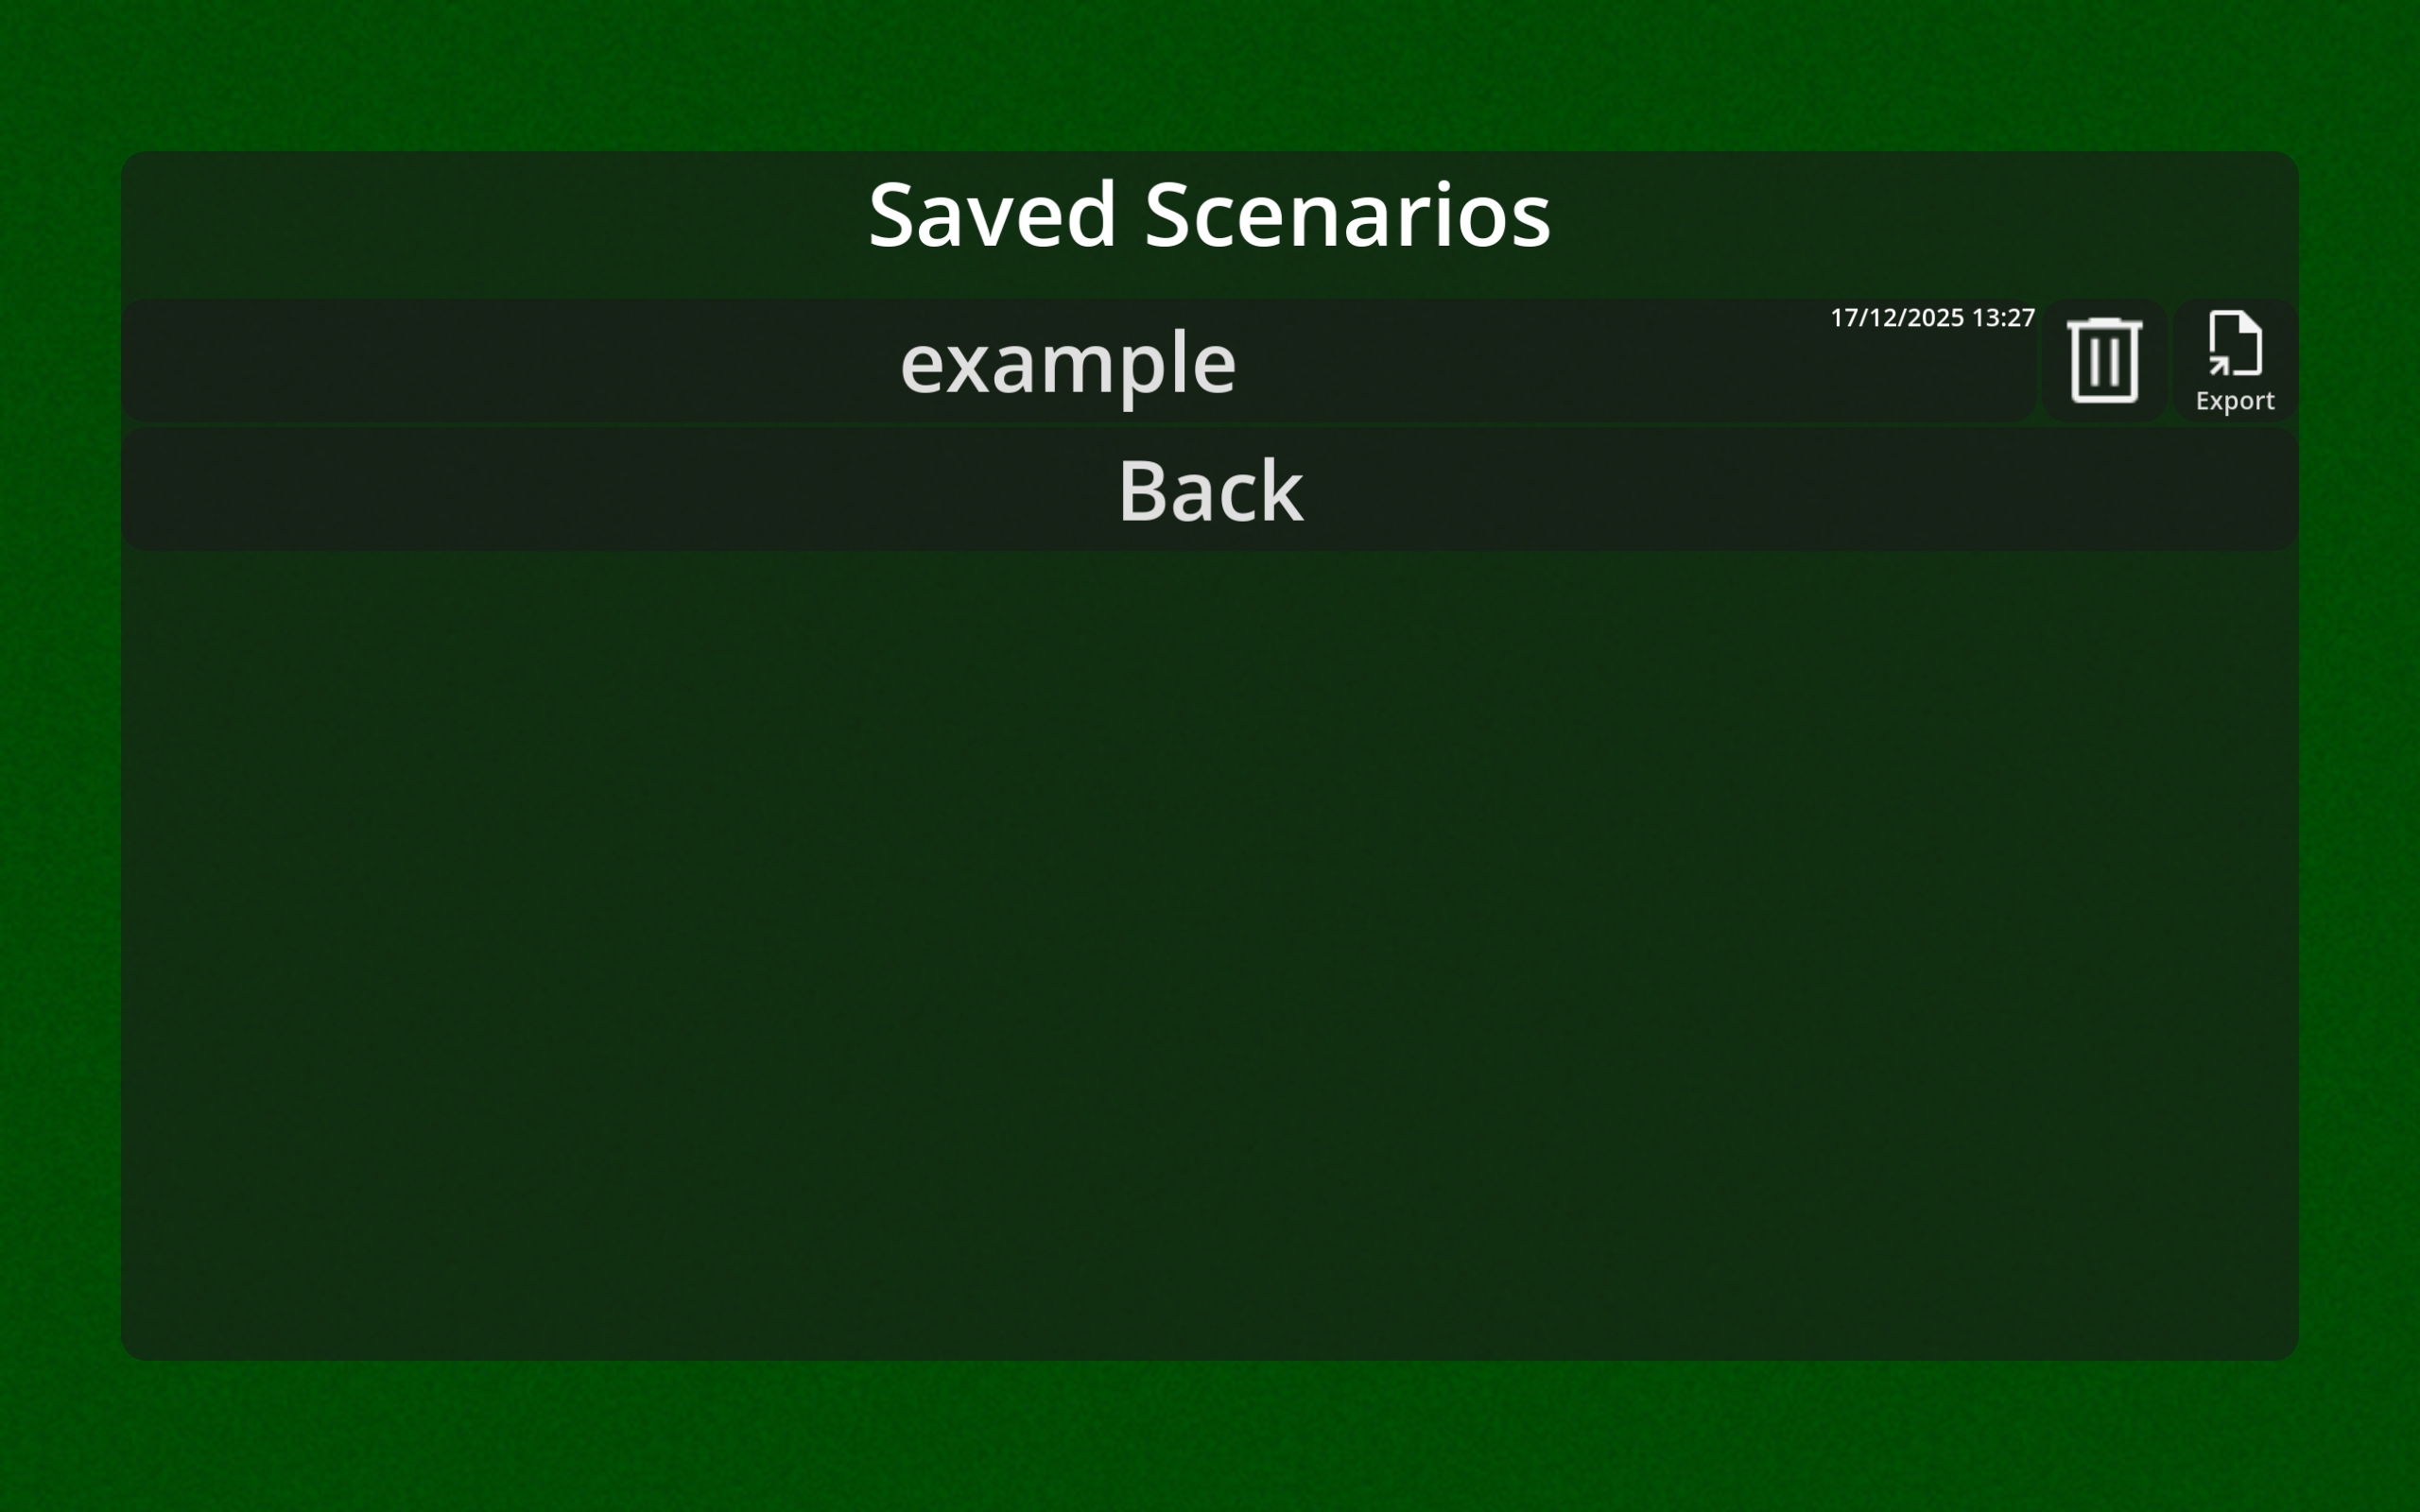
Any scenarios you have saved previously will be listed here. Selecting the button with the name of the scenario will load that scenario. The bin icon to its right is to delete that scenario (a confirmation window will be displayed first).
The rightmost button, labelled “Export”, allows you to save your scenarios outside of the app, so that you can share them with others, or back them up to keep them safe. On Android, you should only attempt to save within the “Downloads” folder - on most devices it will not work in other folders. These can then be loaded with the “Import Image/Scenario” button.
Import Image/Scenario
This button will open a file picker window. If you pick an image file (jpeg or png), a new scenario will be created with this as the background. If you pick a scenario exported from the app (a .json file) it will load that scenario. In either case, if you want this to be in the “Saved Scenarios” list later, use the save button within that scenario.
The Scenario interface
Check Scenarios for a breakdown of what appears in each individual scenario.
Exit button
This button takes you back to the main menu.
Feedback is welcome on whether this should have a confirmation (or prompt you to save). Most of the time the user won’t want to save, so this could be annoying, but when you have put some time into setting up a scenario it could be frustrating to accidentally lose it.
Save button
This button allows you to save the current scenario to the “Saved Scenarios” list, so that you can come back to it later.
Add Object button
This opens a menu with all the objects that can be added to the scenario (see Objects). Objects are categorised in the different taps along the top if the popup. Tapping (or clicking) an object will add it to the screen in Move mode.
Here you can drag the object around freely, and resize or rotate it with two fingers. When you’re finished, press the confirm (tick) button, or double tap (doesn’t work on some platforms, for reasons which defy my understanding at this time).
Drawing button
Pressing the button resembling a pencil allows you to draw on your scenario. You can select different colours (see note below) using the coloured pencil icons, as well as the eraser to remove any pencil markings. The slider below allows you to set the pencil thickness (thickness is also relative to zoom level, so you can draw thinner lines when more zoomed in). When done, press the tick button to return to the normal interface.
Note on colours: you can currently only select from a limited range of colours - I have done this to keep it simple but feedback is welcome if you think there should be different colours, more colours, or a proper colour selection interface so you can freely choose.
Deselect button
The X button here, only visible when an object is selected, allows you to deselect the object. For some objects, using this may be necessary to switch to interacting with another object (or manipulating the scenario).
Move object button
The move button (only visible when an object is selected that can be moved) returns the selected object to move mode (as discussed above under “Add Object Button”), allowing you to reposition it within the scenario.
Delete button
The bin icon (only visible when an object is selected) deletes the selected object.
Feedback is welcome on whether this is too easily pressed accidentally - does this need a confirmation
Adder buttons within the Scenario
In some built-in scenarios, there are “+” buttons that allow you to add automated cars to the scenario. These follow a set path, obeying traffic lights and give ways (but not particularly intelligently), to help you demonstrate one point of view with the normal cars.